Introduction
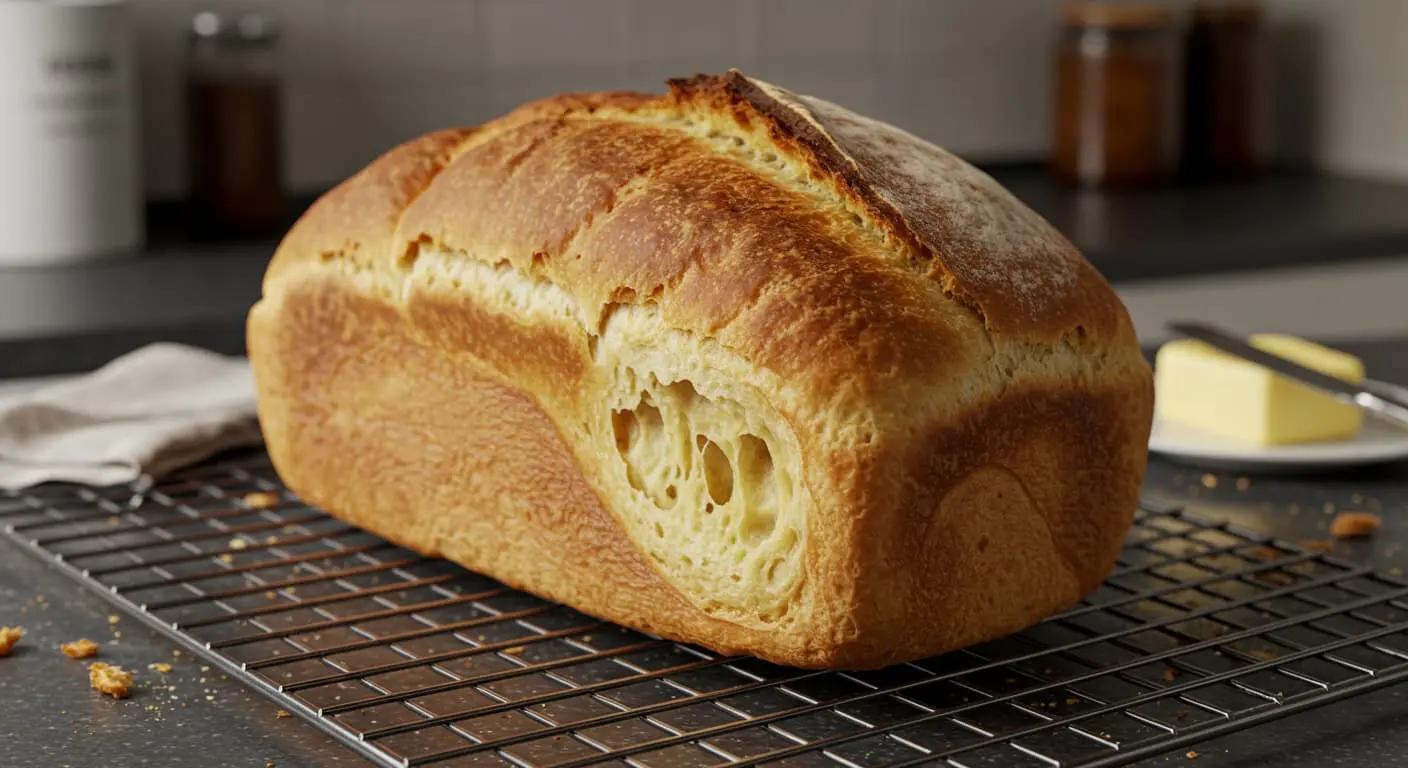
There’s something magical about the smell of freshly baked bread wafting through your kitchen—it’s warm, comforting, and downright irresistible. If you’ve ever wished for a sandwich bread recipe that combines simplicity, speed, and incredible taste, you’re in the right place. Forget the preservatives and bland flavors of store-bought loaves; homemade sandwich bread is fresher, softer, and surprisingly easy to make, even for beginners.
This sandwich bread recipe is designed for anyone who wants to create bakery-quality bread at home without spending hours in the kitchen. Whether you’re a seasoned baker or someone trying bread-making for the first time, this recipe will guide you every step of the way. From selecting the perfect ingredients to achieving that soft, fluffy texture that makes every sandwich a joy to eat, we’ve got you covered.
Not only will you learn how to make a quick and easy sandwich bread recipe, but you’ll also discover tips for getting consistent results, creative variations to customize your loaf, and storage hacks to keep your bread fresh for longer. Ready to ditch store-bought bread and elevate your sandwiches? Let’s get started on this delicious journey!
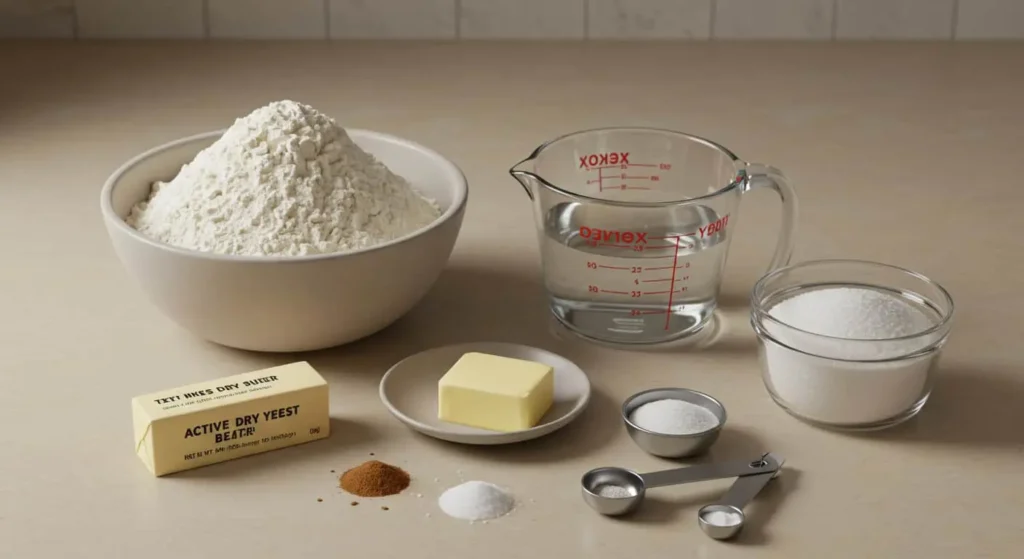
Table of Contents
Ingredients and Tools You’ll Need
Before diving into the process, let’s ensure you have everything ready for this sandwich bread recipe. With the right ingredients measured out and tools at hand, you’ll be on your way to baking soft, fluffy bread that will upgrade every sandwich you make.
Key Ingredients for Sandwich Bread (With Measurements)
Here’s what you’ll need to make one perfect loaf:
- 3 ½ cups (420g) of flour: Use all-purpose flour for a classic texture or substitute half with whole wheat flour for a healthier twist.
- 2 ¼ teaspoons (7g) of active dry yeast or instant yeast: This is equivalent to one standard yeast packet.
- 2 tablespoons (25g) of sugar: Feeds the yeast and gives your bread a hint of sweetness.
- 1 ½ teaspoons (9g) of salt: Balances the flavor.
- 2 tablespoons (28g) of butter: Melted and slightly cooled for richness.
- 1 cup (240ml) of warm water: Around 110°F (43°C) to activate the yeast.
Tools for Baking Bread
Baking this sandwich bread recipe doesn’t require fancy equipment, but having the following tools on hand will make the process smoother:
- Mixing Bowl: A large bowl for mixing and proofing your dough.
- Measuring Cups and Spoons: Accuracy is key for perfect results.
- Loaf Pan: A standard 9×5-inch loaf pan works perfectly for this recipe.
- Stand Mixer (Optional): A dough hook attachment can simplify kneading, but you can also knead by hand.
- Kitchen Thermometer: Useful to check water temperature and ensure your bread is fully baked (internal temp should reach 190°F/88°C).
- Clean Kitchen Towel or Plastic Wrap: To cover the dough during proofing.
Choosing the Right Ingredients
The quality of your ingredients matters! For example, always use fresh, active yeast to avoid disappointing results. Stale yeast may prevent your dough from rising properly, leaving you with a dense loaf. Similarly, choose unbleached, high-quality flour for better texture and flavor. If you want a heartier loaf, try substituting up to 50% of the flour with whole wheat or multigrain flour.
Want to elevate your sandwich bread recipe? Consider these add-ins:
- Seeds: Sprinkle sesame, sunflower, or poppy seeds on top for a crunchy crust.
- Herbs and Spices: Fold in fresh rosemary, thyme, or minced garlic for a savory twist.
- Sweeteners: Swap sugar for honey or maple syrup for a more natural flavor.
Step-by-Step Quick and Easy Sandwich Bread Recipe
Making homemade bread doesn’t have to be complicated. With this sandwich bread recipe, you’ll be guided through every step to ensure your loaf turns out soft, fluffy, and perfect for any sandwich. Whether you’re a beginner or a seasoned baker, these detailed instructions will set you up for success.
Preparing the Dough
The foundation of any great bread is the dough. Follow these steps to prepare it:
- Activate the Yeast:
- In a large mixing bowl, combine 1 cup (240ml) of warm water (about 110°F or 43°C) with 2 tablespoons (25g) of sugar and 2 ¼ teaspoons (7g) of active dry yeast. Stir gently to combine, then allow the mixture to rest undisturbed for 5-10 minutes, during which it will develop a frothy, bubbly surface. This step confirms your yeast is alive and ready to work its magic.
- Add the Dry Ingredients:
- To the yeast mixture, add 3 ½ cups (420g) of flour (start with 3 cups and add more as needed) and 1 ½ teaspoons (9g) of salt.
- Incorporate the Butter:
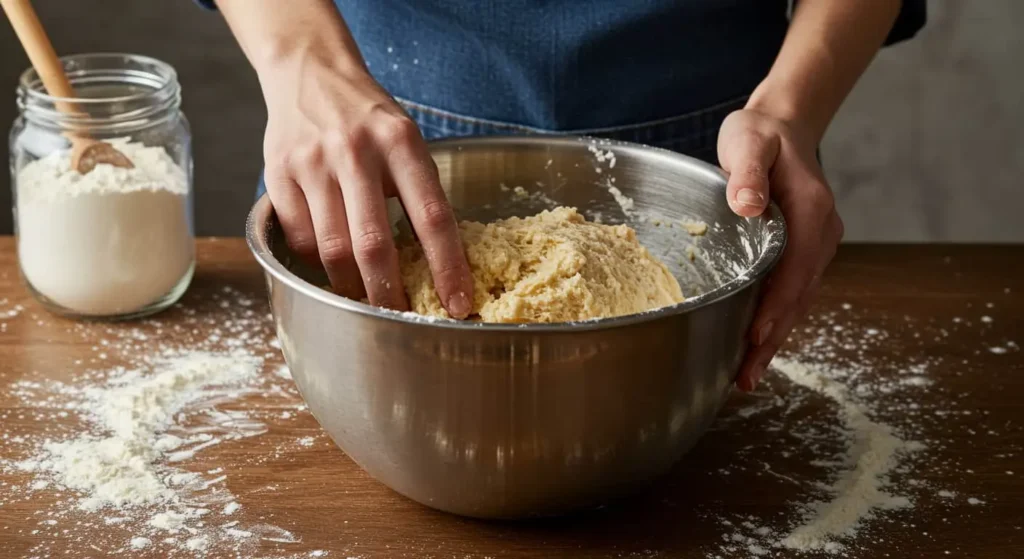
- Add 2 tablespoons (28g) of melted butter to the mixture. Stir everything together using a wooden spoon or spatula until a shaggy dough forms.
- Aim for the Right Consistency:
- The dough should be slightly sticky but manageable. If the dough feels excessively sticky, gradually incorporate additional flour, one tablespoon at a time. You’re aiming for a smooth, elastic dough that doesn’t stick excessively to your hands or the bowl.
Kneading and Proofing
Kneading is where the dough develops structure and elasticity, setting the stage for that soft, airy texture that makes this sandwich bread recipe so good.
- Kneading by Hand:
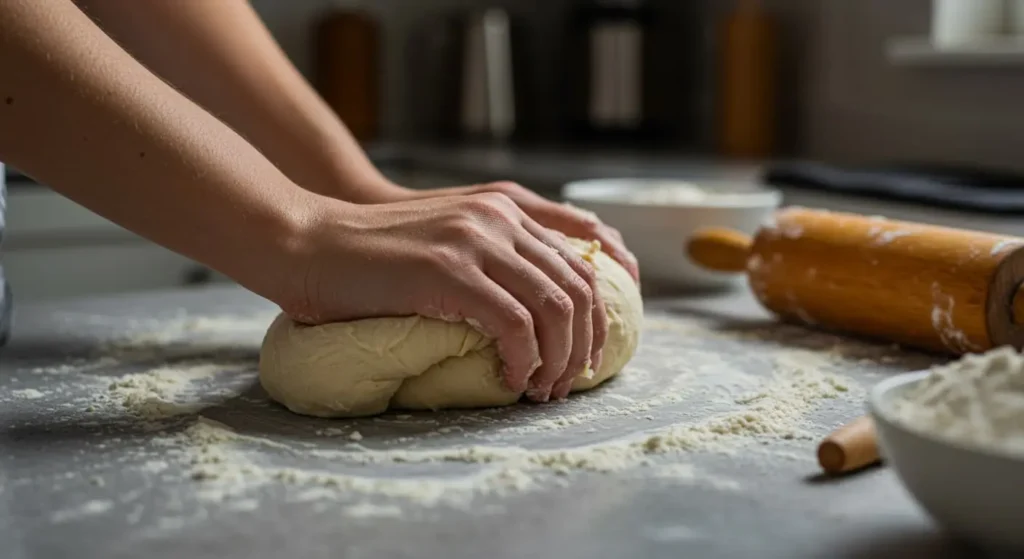
- Transfer the dough to a floured surface. Using the heels of your hands, push the dough forward, fold it back, and rotate. Repeat this motion for about 8-10 minutes until the dough is smooth and stretchy.
- Using a Stand Mixer:
- If you’re using a stand mixer, attach the dough hook and knead the dough on medium speed for about 5-7 minutes. The dough should pull away from the sides of the bowl but remain soft to the touch.
- First Proofing:
- Transfer the kneaded dough to a lightly greased bowl, ensuring it is evenly coated to prevent sticking. Gently drape a clean kitchen towel or plastic wrap over the bowl, creating a protective cover that seals in the moisture and warmth. Allow the dough to rest in a warm, draft-free environment for 1-2 hours, or until it has doubled in size, signaling it is ready for the next step. A good way to check is by gently pressing the dough with your finger—if the indentation remains, it’s ready.

Shaping and Second Proofing
This step shapes your dough into that iconic loaf form that’s perfect for sandwiches.
- Shaping the Dough:
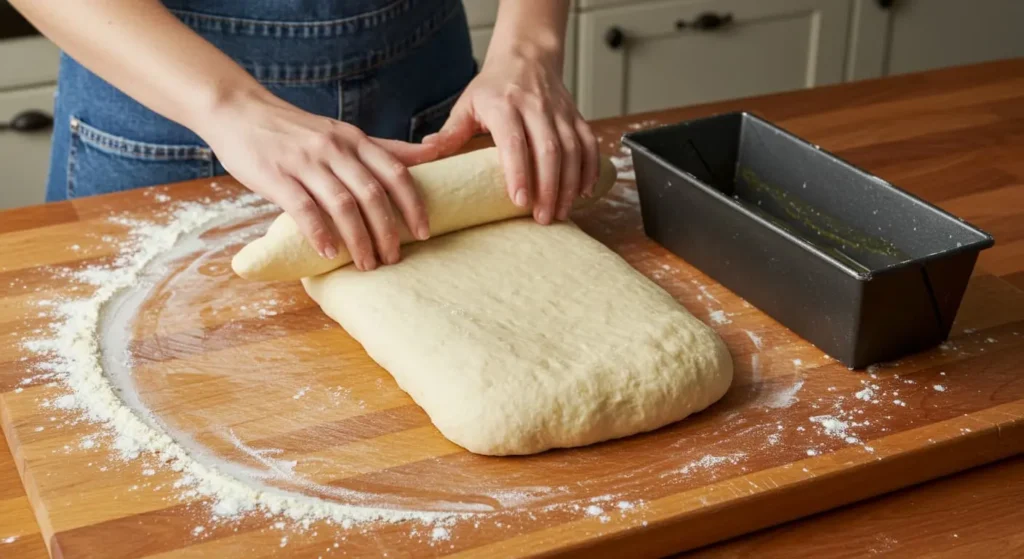
- Punch down the risen dough gently to release air bubbles. Transfer it to a clean surface and shape it into a rectangular loaf by folding the sides inward and rolling it tightly. Pinch the seams to seal the loaf.
- Prepare the Loaf Pan:
- Lightly grease a 9×5-inch loaf pan and place the shaped dough inside, seam side down.
- Second Proofing:
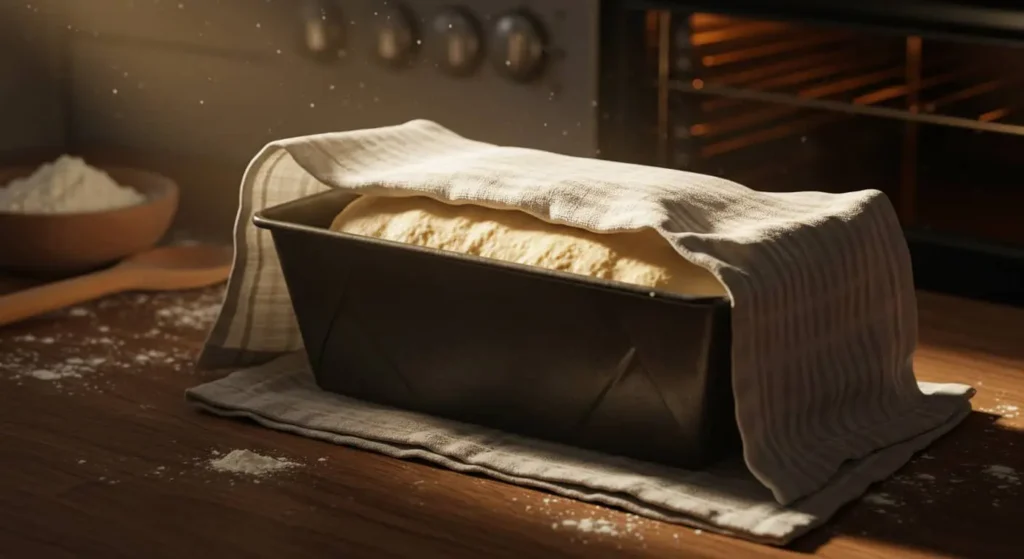
- Drape a clean kitchen towel gently over the loaf to protect it from drying out, and allow it to rise again for approximately 30-45 minutes. The dough should rise just above the edges of the pan, creating a nice dome shape. This step is crucial for achieving that fluffy texture in your sandwich bread recipe.
Baking and Cooling
The final step is where your kitchen fills with the irresistible aroma of fresh bread.
- Preheat the Oven:
- Preheat your oven to 375°F (190°C) while the dough completes its second rise.
- Bake the Bread:
- Carefully transfer the loaf to the preheated oven and bake for 25-30 minutes, or until the top turns a rich golden brown and the bread emits a warm, inviting aroma. Check for doneness by tapping the top of the bread—it should sound hollow. For extra precision, you can use a kitchen thermometer; the internal temperature should reach 190°F (88°C).

- Cool the Bread Properly:
- Once baked, remove the loaf from the pan and place it on a wire rack to cool completely. Cooling is key! Cutting the bread too early can lead to a gummy texture. Allow the bread to cool on a wire rack for at least 1 hour before slicing, as this resting period helps the bread set and enhances its texture, ensuring the slices don’t become too dense or gummy.
Pro Tips for Perfect Sandwich Bread
Baking bread might seem like an art, but with a little know-how, you can consistently nail this sandwich bread recipe and enjoy bakery-quality results every time. Here are some expert tips to help you avoid common pitfalls, achieve the perfect texture, and save time without sacrificing quality.
Avoiding Common Mistakes
Even the most seasoned bakers occasionally run into trouble. Here’s how to steer clear of common bread-baking mistakes:
- Over-proofing or Under-proofing:
Proofing your dough for too long can cause it to collapse, while under-proofing prevents the bread from rising fully. Always aim for dough that doubles in size during proofing. A reliable method to test the dough is the “poke test”—lightly press your finger into the dough and observe how it reacts. If the indentation slowly rebounds, the dough has reached the perfect level of readiness. - Adding Too Much Flour:
It’s tempting to keep adding flour when kneading sticky dough, but this can lead to dense bread. Instead, lightly flour your hands and surface, and knead patiently until the dough becomes smooth and elastic.
How to Achieve Soft and Fluffy Bread
The softness of your loaf is what makes a great sandwich bread recipe, and small tweaks can make a big difference:
- Use the Right Amount of Liquid:
Too little liquid results in dry bread, so measure your water or milk carefully. The dough should feel soft and slightly tacky but not overly wet. - Incorporate Milk or Butter:
Replacing some of the water with milk or adding an extra tablespoon of butter can make your bread richer and softer. These ingredients help keep the bread moist, making it perfect for sandwiches.
For more expert tips on baking homemade bread, check out King Arthur Baking, a trusted source for all things baking-related.
Time-Saving Hacks for Busy Bakers
If you’re short on time but still want fresh bread, these tricks can speed up the process:
- Use Instant Yeast:
Unlike active dry yeast, instant yeast doesn’t need to be dissolved in water first, saving you a step. It also works faster, cutting down proofing time. - Refrigerate the Dough Overnight:
Prepare the dough in advance and allow it to rise gradually in the refrigerator overnight, enhancing its flavor and texture. This not only saves time the next day but also enhances the flavor of your bread. When ready to bake, bring the dough to room temperature and proceed with shaping and proofing.
Storing and Serving Your Homemade Sandwich Bread
Once you’ve baked a fresh, delicious loaf with this sandwich bread recipe, the next step is storing it properly and making the most of every slice. Homemade bread deserves extra care to stay fresh, soft, and flavorful for as long as possible.
How to Store Bread for Freshness
Homemade bread, unlike store-bought loaves, lacks preservatives, which is a good thing but also means it needs a bit of extra attention to stay fresh:
- Airtight Containers or Bread Bags: Store your bread in an airtight plastic or reusable bread bag to lock in moisture and prevent it from drying out. If possible, use a bread box to maintain a balance between moisture and airflow.
- Refrigeration Is a No-Go: Refrigerating bread can actually make it go stale faster due to the cold, dry environment. Instead, store it at room temperature for up to 3 days.
- Freezing for Longer Shelf Life: To keep your bread fresh for weeks, slice the loaf and freeze it in a freezer-safe bag. This way, you can take out individual slices as needed and toast or thaw them directly.
Best Ways to Serve Sandwich Bread
The versatility of this sandwich bread recipe is what makes it so special. Here are a few ways to enjoy it:
- Classic Sandwiches: Build a classic BLT, turkey club, or veggie-packed sandwich.
- Grilled Cheese Heaven: Layer gooey cheese between two slices and grill to golden perfection.
- Breakfast Boost: Use it for avocado toast, French toast, or a hearty fried egg sandwich to kickstart your day.
- Snack Ready: Spread peanut butter and jelly, Nutella, or hummus for a quick and satisfying snack.
Reheating or Reviving Stale Bread
Even if your bread starts to lose its softness, don’t toss it out!
- Oven Refresh: Wrap the bread in foil and warm it in a preheated oven at 350°F (175°C) for 10-15 minutes. This will restore some moisture and softness.
- Microwave Hack: Wrap a slice in a damp paper towel and microwave for 10-15 seconds. This quick trick works wonders for reviving a stale piece.
- Transform It: Turn slightly stale bread into croutons, breadcrumbs, or bread pudding for a whole new culinary adventure.
Conclusion
Making homemade sandwich bread is a simple and rewarding process that brings both convenience and delicious results. This sandwich bread recipe doesn’t just save you from store-bought options, but it also allows you to enjoy the freshness and customizable flavors that make every bite special. From the ease of preparation to the joy of having a warm, fluffy loaf on hand, there’s truly no better way to elevate your sandwiches.
Now that you’ve mastered this basic sandwich bread recipe, feel free to get creative! Experiment with different flours, add-ins like seeds or herbs, or even try making a whole grain version for a healthier twist. The possibilities are endless, and every loaf can be uniquely yours.
I’d love to hear about your baking adventures! Share your results in the comments or let me know if you have any tips to make this sandwich bread recipe even better. Did you try any fun variations? Don’t hesitate to share your favorite add-ins or twists! Happy baking, and enjoy every delicious slice!
Looking for more meal ideas? Check out our Dinner or Lunch sections for a variety of delicious recipes to complement your sandwich bread.
sandwich bread recipe

A soft, fluffy sandwich bread recipe that’s perfect for everyday use. Made with simple pantry staples, this loaf delivers a classic taste and texture ideal for toast, sandwiches, or just warm slices with butter.
Type: Lunch
Cuisine: American
Keywords: sandwich bread recipe
Recipe Yield: 1 standard 9x5-inch loaf (8–10 slices)
Calories: 120–150 CALORIES
Preparation Time: PT15M
Cooking Time: PT30M
Total Time: PT2H15M
Recipe Ingredients:
- flour
- active dry yeast or instant yeast
- sugar
- butter
- warm water

